

How to Create a bouncy Animated Sign up page
With the Use of Only #HTML, #CSS and #JavaScript. Inspired by Zander WhiteHurst

I am a designer of things.
I am a Lad with an eye catch in the Tech World.
Software Development <FERN/>
Hello World! 👋
This is my first blog and today we will be learning how to Create a bouncy Animated Sign up page.
I was inspired by Zander Whitehurst on twitter (You all might know him "The Supafast Figma Guy" 😂) and i will show you how it is done with HTML, CSS and Vanilla JavaScript.
To begin with, we create our separate HTML, CSS and JavaScript file on a new folder on your code editor. I use Visual studio code as my code Editor
- HTML
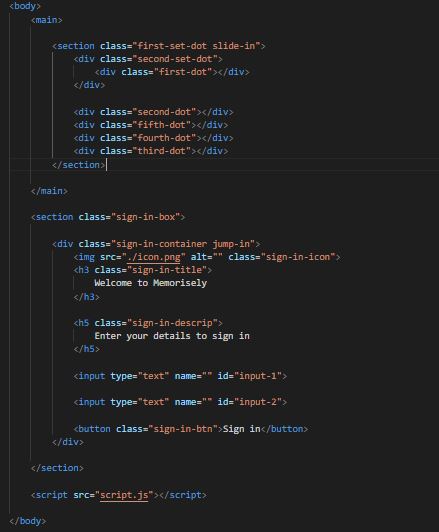
You first create a separate tags under your body tag for the Bouncy Effect and the Sign up page proper. The first tag which is the Main tag contains the bouncy effect while the second tag, the section tag contains the sign up page.
As you might have noticed, the main tag contains different "-dot" classes which are not arranged numerically correct on the code Editor. This is because the numbering is for the appearance of each dot as appeared on your screen as at the time of the effect.
- CSS and JavaScript
Will be talking on only the animation effect.
a) First Animation

JS
CSS
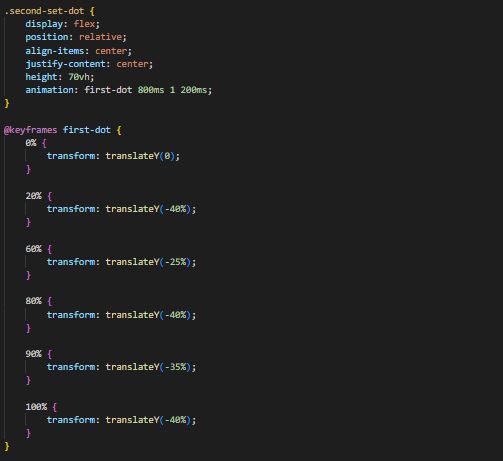
The first Animation is that which contains the first appearing dot. This is the major bouncy effect that you see when you load the page. It is done with the intersection Observer javaScript function and the Keyframes Transform TranslateY-axis CSS property.
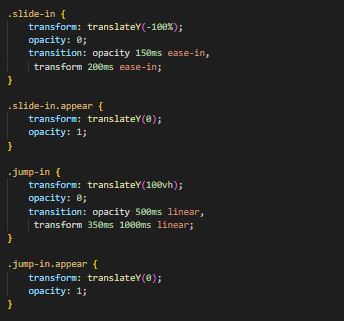
The intersection Observers are controlled by a group of class selector in CSS as shown below.
After this, the first dot disappears and the second dot takes the place of the first dot last position.
All the disappearing effects in this article are done with javaScript setInterval functions as shown below.

b) Second Animation
This is where the second animation comes in.
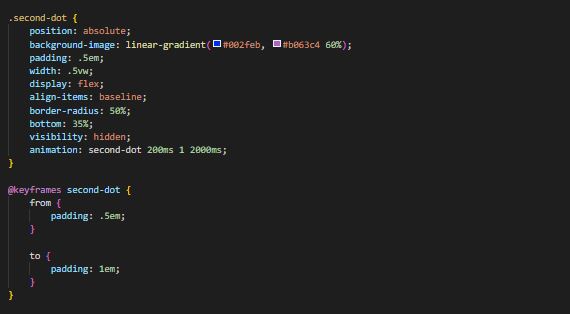
The increase of size of the second dot. It then disappears.
c) Third Animation
The animation is the appearance of the third dot at the same size and at the same position as the second dot but at a different angle of its linear gradient.
It disappears and the fourth dot appears where the third dot left off at the same linear gradient but then changes to a different angle and scales down to Zero for the appearance of the fifth and final dot
d) Final Animation
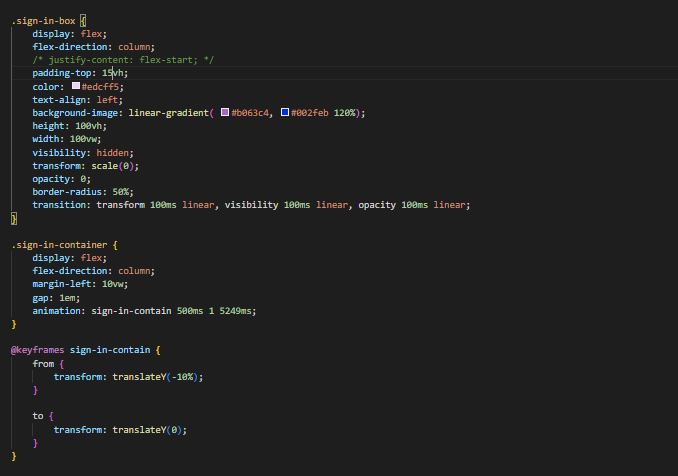
When the fifth dot appears and disappears, the Section tag transit in from a low scale to a higher scale and opacity. The coming up effect of the sign-up box is done by the Intersection observer function as shown above.
After it appears, a little keyframe TranslateY-axis animation is done for the little vertical tilt at the end of the animation.
This is the end of the Article. Ka ọ dị 🤣.
Code Source: https://codepen.io/Vizion_Snilloc_jr/pen/eYMGayP
