

How to Create a Contact form with Email JS using Vanilla JavaScript with Validation.
How to create a contact form like that of RandoJokes.

I am a designer of things.
I am a Lad with an eye catch in the Tech World.
Software Development <FERN/>
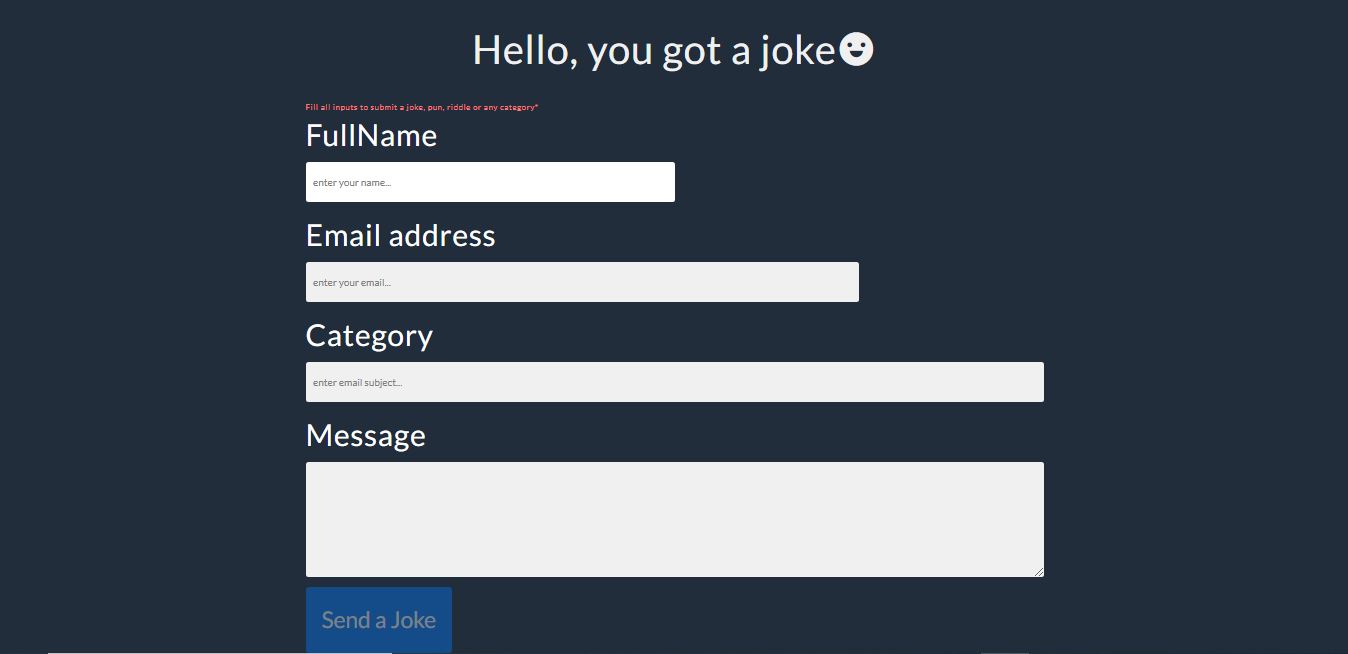
The sample of what we will be working on..
So many must have asked, "How did you manage to build the contact form?, what stack did you use?". Well you got your answers now. You can do such with email.js and with javaScript.
In this Tutorial, i will be showing you how you can add a contact form on any of your project or websites. Let's begin!
THE EMAIL JS PART
1. Setting up your account
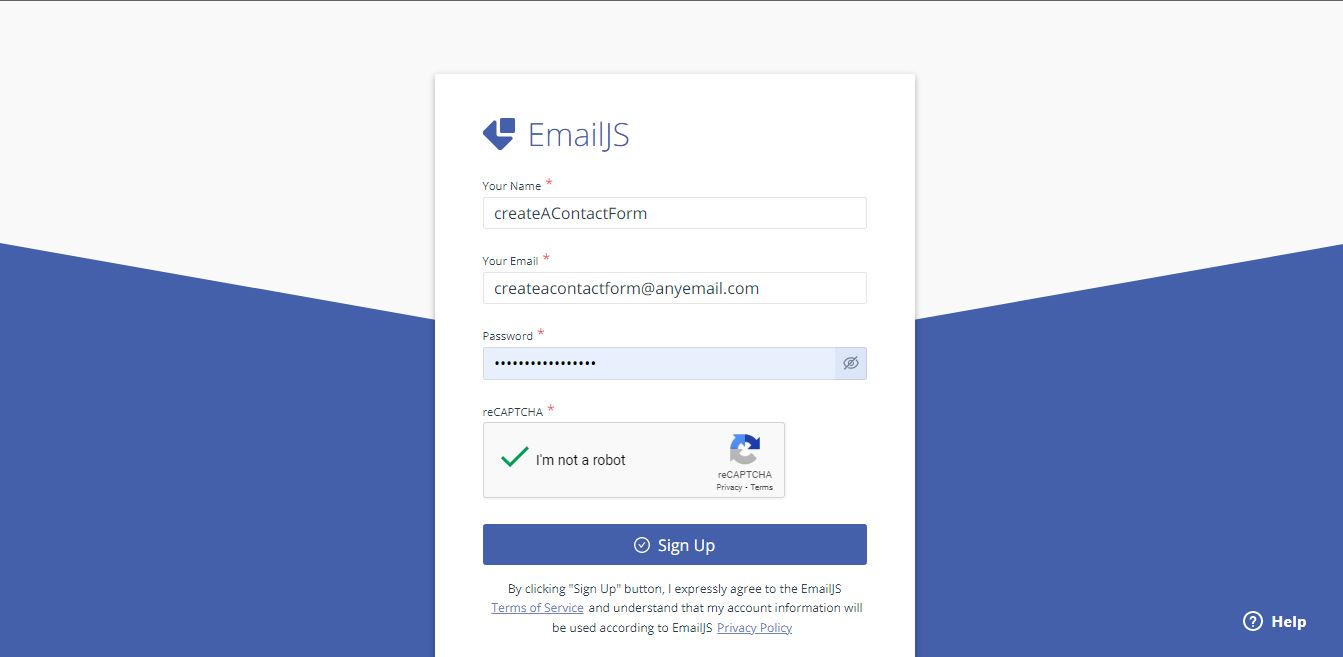
a. Go to EmailJS and click on Create Free Account

b. Input the required details and click on Sign Up
You would be taken to a your dashboard like below
Yours will still be empty
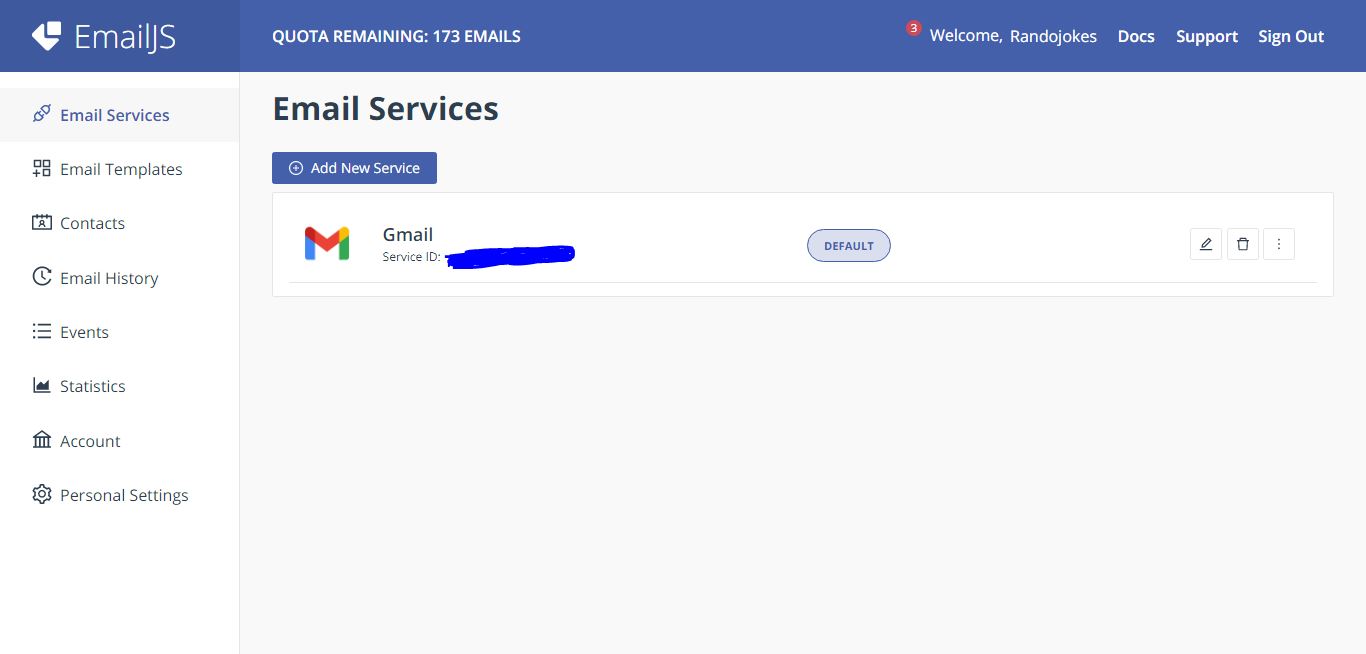
2. Adding a New Email Service
a. Click on Email service on your dashboard menu and then click on"Add New Service"
b. Click on Gmail from the dialogue box

You will get a screen like below showing your Service ID
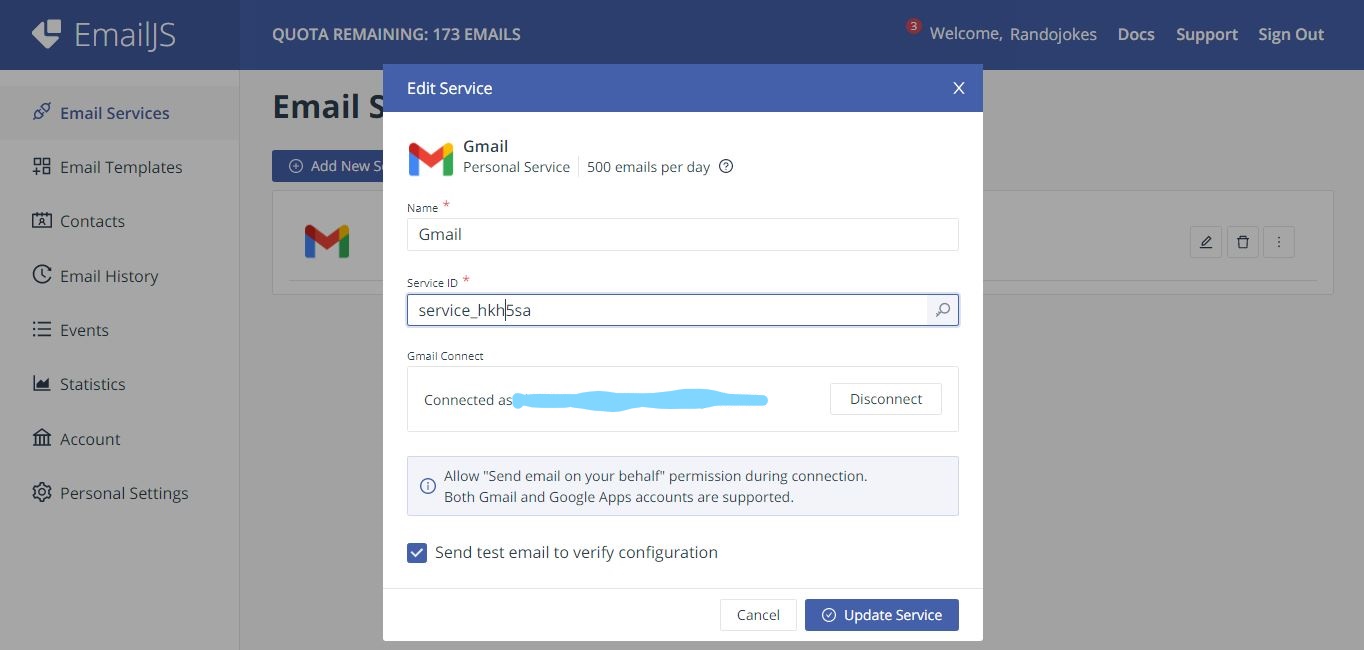
I have connected mine but you will get something like this below your service ID
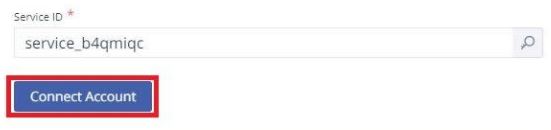
c. Click on Connect Account just below the Service ID.
d. Remember not to uncheck Send test email to verify configuration if you want to receive a test email after connecting account
e. You will Receive a Gmail authorization screen. Select the email you would love to connect to to your Email.JS account and Check all available boxes
f. When the connection is successful, you should have a screen like mine
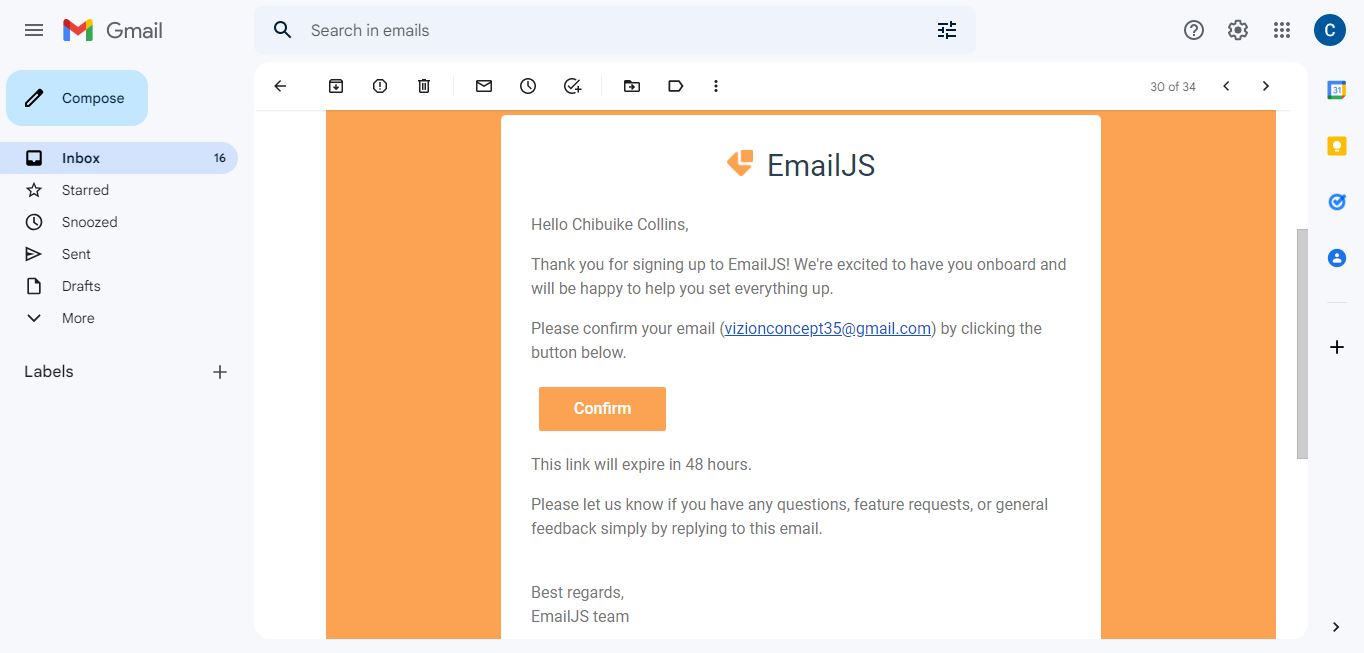
g. Check you email to receive confirmation of connection. You should Receive something like below
h. Click on Create Service. It should be in place of update service like in mine
i. You should have a New service created now
3. Create Your Email Template
a. Click the Email Templates link
Here you customize how you want your received email format to look like
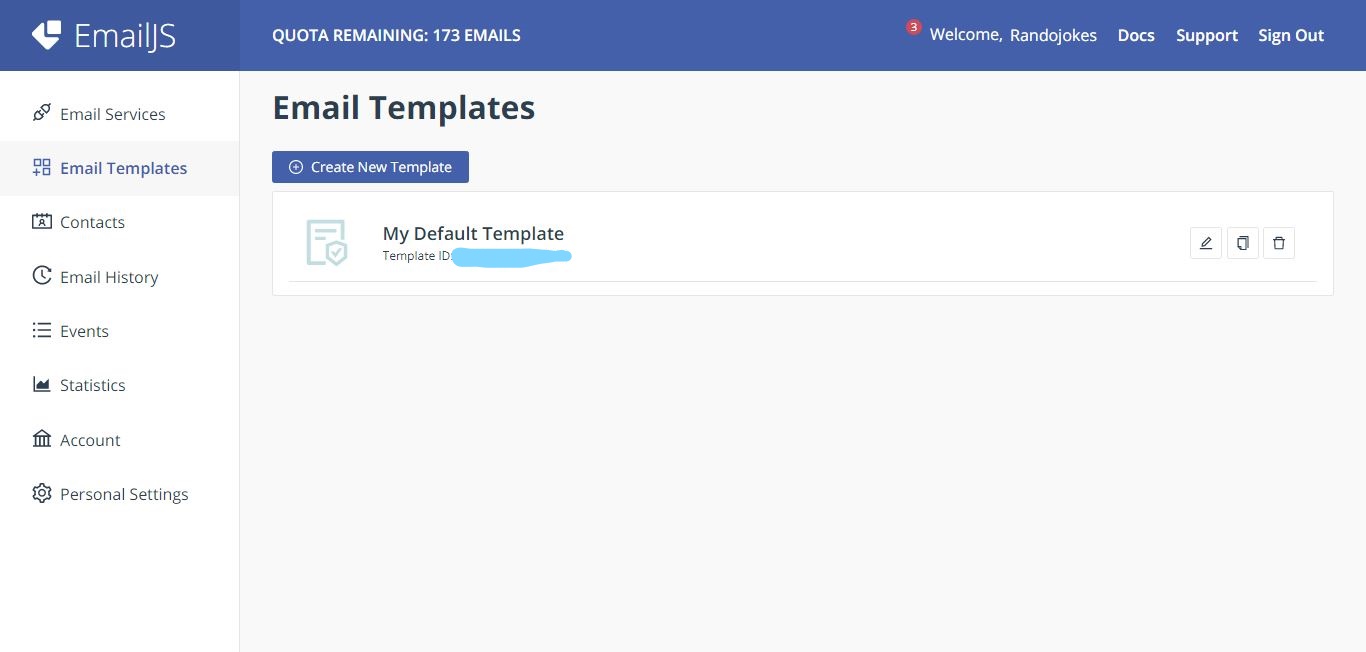
b. Click on "Create New Template".
c. You should receive something like below
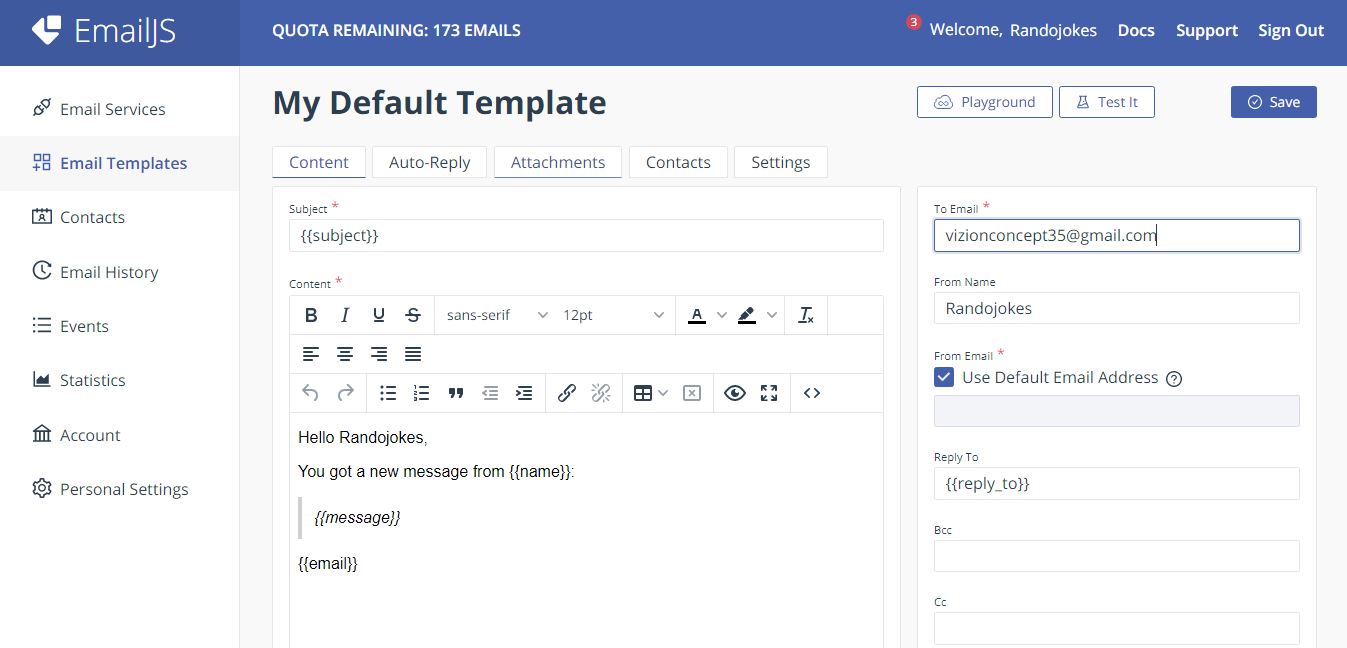
d. The Screen that appears looks like an Email messaging screen
e. You can re-edit it to what ever form you like.
The curly braces {{ }} makes each word inside it a variable that would be used in javaScripting. will be explained more during javaScript
As in my Edit
{{subject}} shows the category as shown in the result.
{{name}} shows the full name.
{{email}} receives the sender email and displays it on your email.
{{message}} should receive the senders message.
f. Now Click on save.
g. You can now Click on Test It to get a sample
h. Let us move over to JavaScript.
THE JAVASCRIPT PART
a. Firstly create an index.html page
b. Then create a script.js page
c. Now just before the body closing tag of your index.html link your script.js like below

d. In your index.html file, inside the head tag, you link your Tailwind CSS and Bootstrap CSS using CDN. We will be using both here.

You can get your CDN files from jsdelivr or from unpkg like above.
e. Let us link our Email JS and Bootstrap js file just before the closing body tag
<!-- emailjs -->
    <script
      type="text/javascript"
      src="https://cdn.jsdelivr.net/npm/emailjs-com@3/dist/email.min.js"
    ></script>
    <!-- bootstrap js -->
    <script
      src="https://code.jquery.com/jquery-3.5.1.slim.min.js"
      integrity="sha384-DfXdz2htPH0lsSSs5nCTpuj/zy4C+OGpamoFVy38MVBnE+IbbVYUew+OrCXaRkfj"
      crossorigin="anonymous"
    ></script>
    <script
      src="https://cdn.jsdelivr.net/npm/bootstrap@4.5.3/dist/js/bootstrap.bundle.min.js"
      integrity="sha384-ho+j7jyWK8fNQe+A12Hb8AhRq26LrZ/JpcUGGOn+Y7RsweNrtN/tE3MoK7ZeZDyx"
      crossorigin="anonymous"
    ></script>
f. Now let us edit our index.html file
<article class="container article h-full mt-20">
      <div class="row">

        <div class="col align-self-center">
          <h1 class="submit-headere-text text-center text-4xl mb-12 lg:text-6xl flex flex-row items-center justify-center"><span>Hello, you got a joke</span> <i class="ri-emotion-fill"></i></h1>


        <h5 id="alertComment">
            Fill all inputs to submit a joke, pun, riddle or any category*
        </h5>

          <!-- contact form -->
          <form id="myForm">
            <!-- name -->
            <div class="form-group">
              <label class="text-3xl lg:text-5xl" for="name">FullName</label>
              <input
                type="name"
                name="name"
                class="form-control pb-8 pt-8 w-50"
                id="name"
                placeholder="enter your name..."
              />
            </div>

            <!-- email -->
            <div class="form-group">
              <label class="text-3xl lg:text-5xl" for="email">Email address</label>
              <input
                type="email"
                name="email"
                class="form-control pb-8 pt-8 w-75"
                id="email"
                placeholder="enter your email..."
              />
            </div>

            <!-- subject -->
            <div class="form-group">
              <label class="text-3xl lg:text-5xl" for="subject">Category</label>
              <input
                type="text"
                name="subject"
                class="form-control pb-8 pt-8 w-80"
                id="subject"
                placeholder="enter email subject..."
              />
            </div>

            <div class="form-group">
              <label class="text-3xl lg:text-5xl" for="message">Message</label>
              <textarea class="form-control pb-8 pt-8" id="message" name="message" rows="5"></textarea>
            </div>

            <button type="submit" class="btn btn-primary p-6 text-4xl" id="sendJoke" disabled ="true">Send a Joke</button>
          </form>
        </div>
      </div>
    </article>
g. Our Plain CSS should look like
/* submit-joke */
.article {
    max-width: 768px;
}

.submit-headere-text {
    color: rgb(240, 240, 240);
}

.form-control {
    border: none;
    background-color: rgb(240, 240, 240);
}

.form-control:hover {
    background-color: #fff;
}

.form-control::placeholder {
    color: gray;
}

#alertComment {
    color: rgb(255, 119, 119);
    visibility: visible;
    font-size: .5em;
}

#sendJoke {
    opacity: .4;
}

#sendJoke.activated {
    opacity: 1;
}
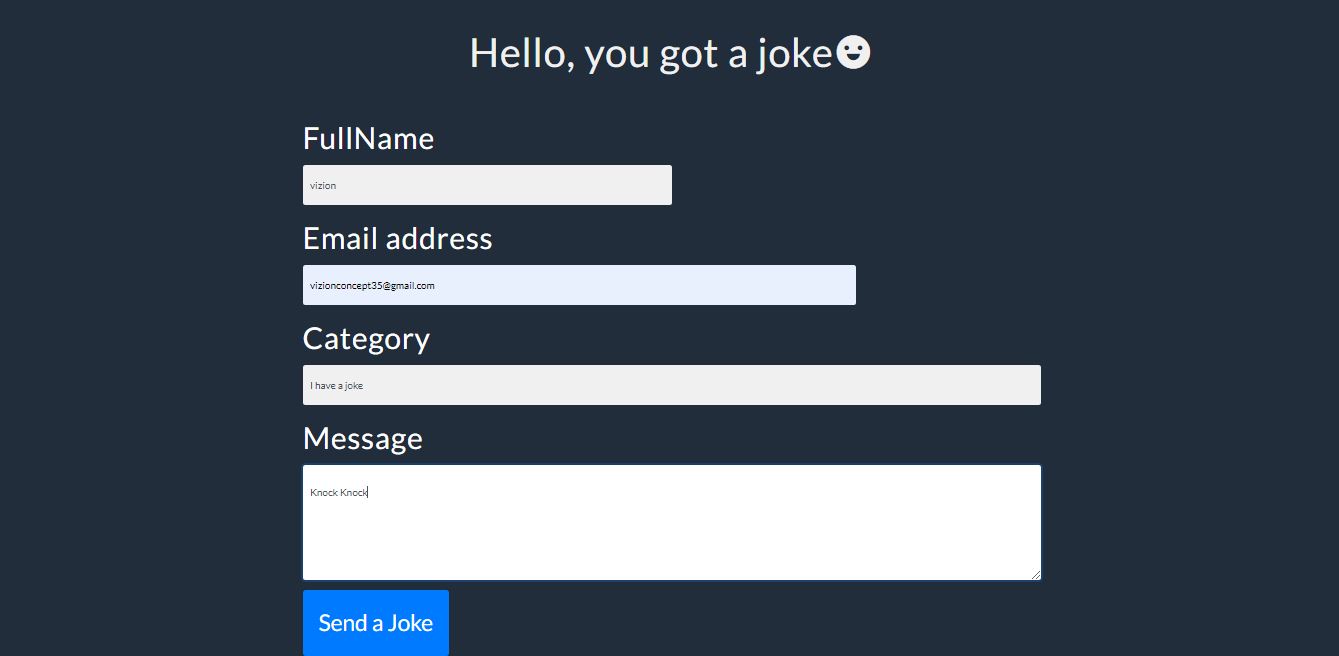
h. You should have your screen like below but not functional yet.
i. Now let us make it functional
Install emailJS by passing the function
(function () {
    emailjs.init("YOUR_PUBLIC_KEY");
  })();
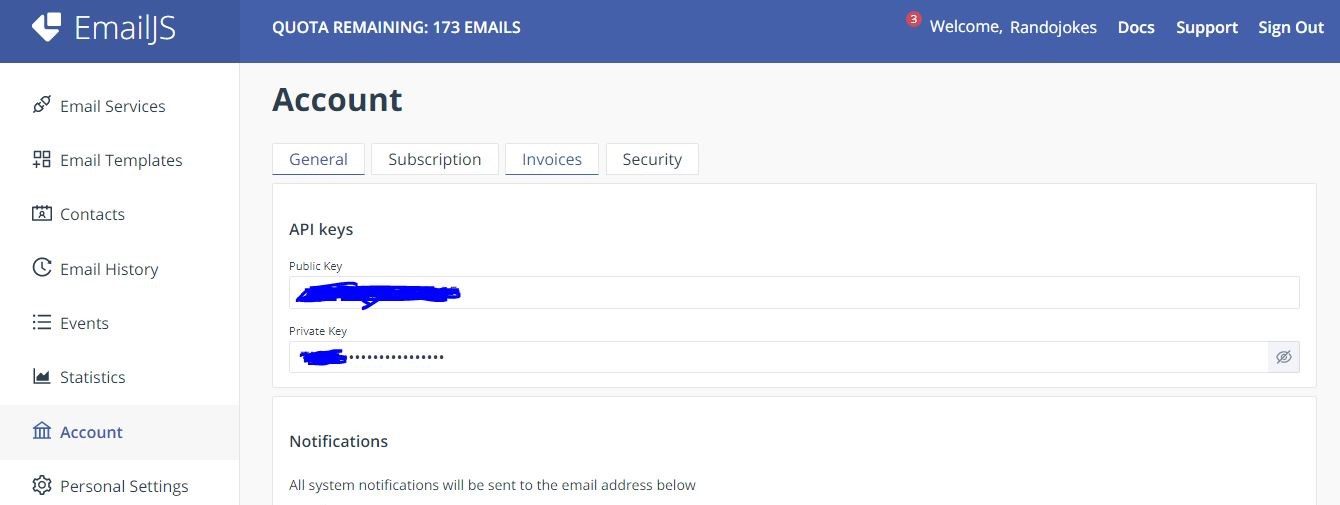
j. Get your Public key by going to your EmailJS dashboard and clicking on Account. You will find your public Key there .
k. In your script.js pass this code. To avoid empty email, we will need to add a then...catch... block, like below. This is the first form of validation
  document.getElementById("myForm").addEventListener("submit", function (event) {
    event.preventDefault();

    const serviceID = "YOUR_SERVICE_ID";
    const templateID = "YOUR_TEMPLATE_ID";


    emailjs.sendForm(serviceID, templateID, this).then(
      (response) => {
        console.log("SUCCESS!", response.status, response.text);
        alert("SUCCESS!");
      },
      (error) => {
        console.log("FAILED...", error);
        alert("FAILED...", error);
      }
    );
  });
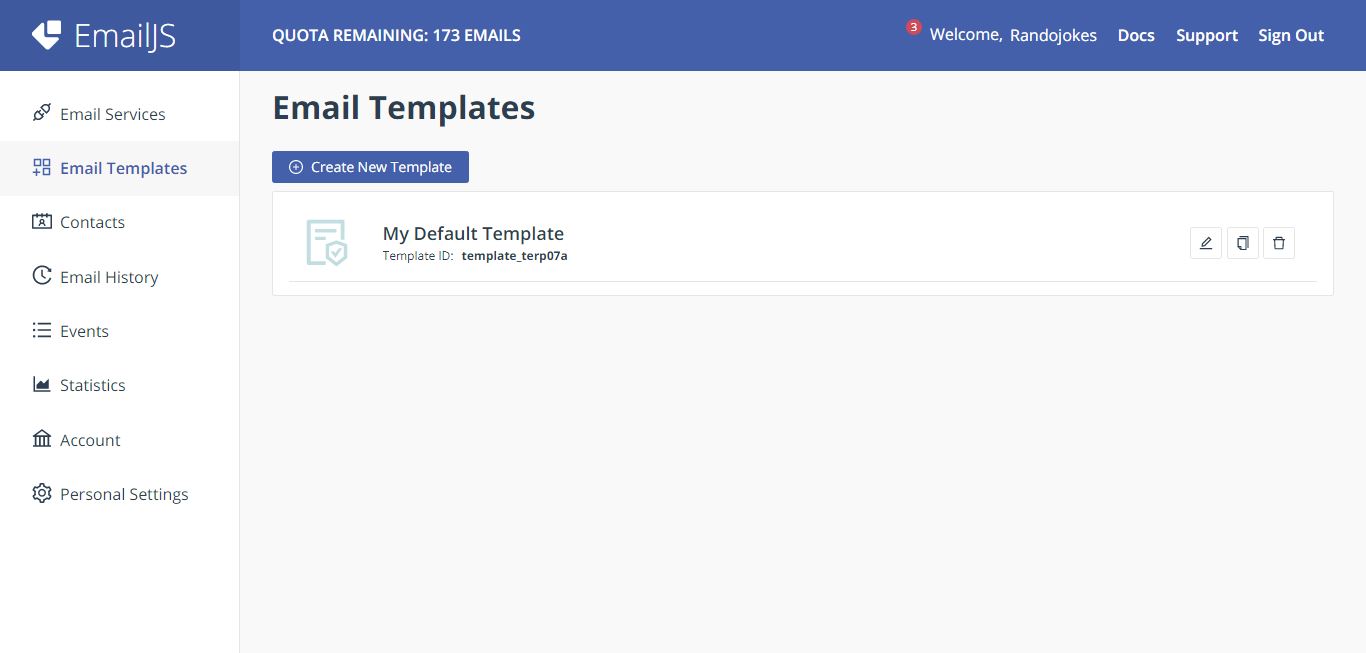
You will find your Service ID and your Template ID when you click on Email Services and Email Template Respectively on your dashboard as below

l. Now, we are ready but not yet ready, LOL.
If you test it now it will work, but we will need to add a Full validation that Users can only submit when all input has a required length and to be sure the Email format is an original Email format and not something like randojokes. com @gmail . LOL
THE VALIDATION PART
a. Firstly we create variables to select all elements we would use
const eJS_message = document.getElementById('message');
const eJS_fullName = document.getElementById('name');
const eJS_sendJoke = document.getElementById('sendJoke');
const eJS_email = document.getElementById('email');
const eJS_subject = document.getElementById('subject');


let canSubmit = false;
let reaction = null;
b. Now we will create event Listeners for all inputs.
function eJS_set_event_listeners() {
    eJS_fullName.addEventListener('keyup', eJS_can_submit);
    eJS_email.addEventListener('keyup', eJS_can_submit);
    eJS_subject.addEventListener('keyup', eJS_can_submit);
    eJS_message.addEventListener('keyup', eJS_can_submit);
}
eJS_set_event_listeners();
c. Now we have a common function for all our event listeners eJS_can_submit()
d. Let us now create our Email Regex for only correct email format to be allowed. The code goes like this
  // validate Email Address

function eJS_validateEmail(email) {
    const re = /^(([^<>()\[\]\\.,;:\s@"]+(\.[^<>()\[\]\\.,;:\s@"]+)*)|(".+"))@((\[[0-9]{1,3}\.[0-9]{1,3}\.[0-9]{1,3}\.[0-9]{1,3}\])|(([a-zA-Z\-0-9]+\.)+[a-zA-Z]{2,}))$/;
    return re.test(String(email).toLowerCase());
}
e. Finally we will have to pass in new variables in our created function when we made our event Listeners.
function eJS_can_submit () {
    //check the required field

    let message = eJS_message.value.trim();
    let email = eJS_email.value.trim();
    let fullName = eJS_fullName.value.trim();
    let subject = eJS_subject.value.trim();

    if (message.length > 4 && email.length > 4 && fullName.length > 1 && subject.length > 1) {
        alertComment.style.visibility = "hidden";
        if (eJS_validateEmail(email)) {
            eJS_sendJoke.classList.add('activated');
            eJS_sendJoke.disabled = false;
            canSubmit = true;

        }else {
            eJS_disabled_submit();
        }
    } else {
        alertComment.style.visibility = "visible";
        eJS_disabled_submit();
    }
};
The trim() method is used to avoid spacing at the beginning and end of all inputs. Now we pass a condition that if message, email, fullName and subject have length greater than 4, 4, 1, 1 respectively, the notice above the form should be removed and if Email is validated (eJS_validateEmail(email)) as well as the 4 conditions above;
i. The 'send a joke' button opacity should be increased.
ii. The 'send a joke' button should be enabled.
iii. and submitting should be possible.
if not, a new function, which keeps the default function (eJS_disabled_submit()) before hand.
if message, email, fullName and subject have length less than 4, 4, 1, 1 respectively, the notice should still be visible as well as the function (eJS_disabled_submit()).
Now, let us create the function (eJS_disabled_submit()):
function eJS_disabled_submit() {
            eJS_sendJoke.classList.remove('activated');
            eJS_sendJoke.disabled = true;
            canSubmit = false;
};
This function eJS_disabled_submit() shows that;
i. The 'send a joke' button opacity should be decreased.
ii. The 'send a joke' button should be disabled.
iii. and submitting should not be possible.
f. Let us test this...
If the Inputs are not filled to required length, we will have as below
else if the Inputs are filled to required length, we will have as below
Phewww!!
Now we have come to the end of this wonderful class
You can check up my other pages on;
Ka ọ dị 🤣
